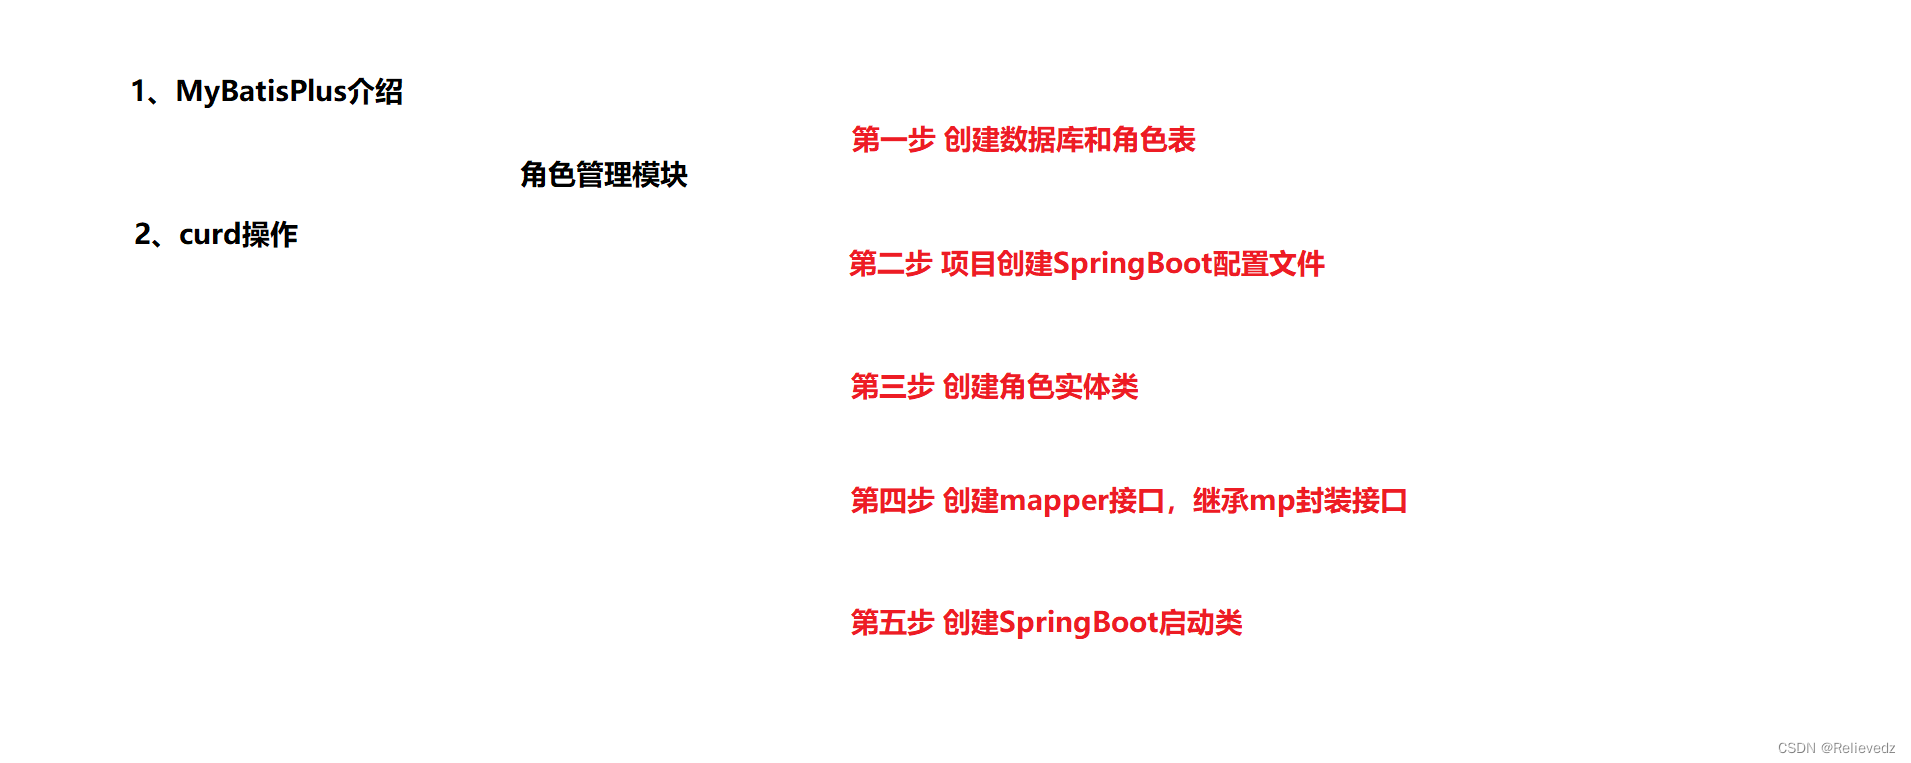
MyBatis-Plus的基本操作
目录
1、配置文件
1、添加依赖
2、启动类
3、实体类
4、添加Mapper类
5、测试Mapper接口
2、CRUD测试
1、insert添加
2、修改操作
3、删除操作
3、MyBatis-Plus条件构造器
4、knife4j
1、Swagger介绍
2、集成knife4j
3.添加依赖
4 添加knife4j配置类
5、 Controller层添加注解
6、测试
5、分页查询
1、配置分页插件
2、分页controller
3、测试
6、其他controller方法
7、统一异常处理
1、制造异常
2、全局异常处理
2.1、创建统一异常处理器
3、处理特定异常
1、添加异常处理方法
2、处理自定义异常
3、业务中需要位置抛出
4、添加异常处理方法
1、配置文件

sql语句
CREATE TABLE `sys_role` (
`id` bigint(20) NOT NULL AUTO_INCREMENT COMMENT '角色id',
`role_name` varchar(20) NOT NULL DEFAULT '' COMMENT '角色名称',
`role_code` varchar(20) DEFAULT NULL COMMENT '角色编码',
`description` varchar(255) DEFAULT NULL COMMENT '描述',
`create_time` timestamp NOT NULL DEFAULT CURRENT_TIMESTAMP COMMENT '创建时间',
`update_time` timestamp NOT NULL DEFAULT CURRENT_TIMESTAMP ON UPDATE CURRENT_TIMESTAMP COMMENT '更新时间',
`is_deleted` tinyint(3) NOT NULL DEFAULT '0' COMMENT '删除标记(0:不可用 1:可用)',
PRIMARY KEY (`id`)
) ENGINE=InnoDB AUTO_INCREMENT=9 DEFAULT CHARSET=utf8 COMMENT='角色';
1、添加依赖
<dependency>
    <groupId>com.baomidou</groupId>
    <artifactId>mybatis-plus-boot-starter</artifactId>
    <version>${mybatis-plus.version}</version>
</dependency>
2、配置 MySQL 数据库的相关配置及Mybatis-Plus日志
application.yml
spring:
  application:
    name: service-oa
  profiles:
    active: dev
application-dev.yml
server:
  port: 8800
mybatis-plus:
  configuration:
    log-impl: org.apache.ibatis.logging.stdout.StdOutImpl # 查看日志
spring:
  datasource:
    type: com.zaxxer.hikari.HikariDataSource
    driver-class-name: com.mysql.cj.jdbc.Driver
    url: jdbc:mysql://localhost:3306/guigu-oa?serverTimezone=GMT%2B8&useSSL=false&characterEncoding=utf-8
    username: root
    password: 123456
2、启动类
在 Spring Boot 启动类中添加 @MapperScan 注解,扫描 Mapper 文件夹:
package com.atguigu;

import org.mybatis.spring.annotation.MapperScan;
import org.springframework.boot.SpringApplication;
import org.springframework.boot.autoconfigure.SpringBootApplication;
import org.springframework.context.annotation.ComponentScan;

@SpringBootApplication
@MapperScan("com.atguigu.auth.mapper")
public class ServiceAuthApplication {

    public static void main(String[] args) {
        SpringApplication.run(ServiceAuthApplication.class, args);
    }

}
3、实体类
已引入,实体类说明:
实体类注解详细文档:注解 | MyBatis-Plus
@TableName:表名注解,标识实体类对应的表
@TableId:主键注解,type = IdType.AUTO(数据库 ID 自增)
@TableField:字段注解(非主键)
@TableLogic:逻辑删除
package com.atguigu.model.system;
import com.baomidou.mybatisplus.annotation.TableField;
import com.baomidou.mybatisplus.annotation.TableName;
import com.atguigu.model.base.BaseEntity;
import lombok.Data;
@Data
@TableName("sys_role")
public class SysRole extends BaseEntity {
private static final long serialVersionUID = 1L;
//角色名称
@TableField("role_name")
private String roleName;
//角色编码
@TableField("role_code")
private String roleCode;
//描述
@TableField("description")
private String description;
}
4、添加Mapper类
package com.atguigu.auth.mapper;
import com.atguigu.model.auth.SysRole;
import com.baomidou.mybatisplus.core.mapper.BaseMapper;
import org.apache.ibatis.annotations.Mapper;
@Mapper
public interface SysRoleMapper extends BaseMapper<SysRole> {
}
5、测试Mapper接口
//查询所有记录
@Test
public void testSelectList() {
    //UserMapper 中的 selectList() 方法的参数为 MP 内置的条件封装器 Wrapper
    //所以不填写就是无任何条件
    List<SysRole> users = sysRoleMapper.selectList(null);
    System.out.println(users);
}

通过以上几个简单的步骤,我们就实现了 User 表的 CRUD 功能,甚至连 XML 文件都不用编写!
2、CRUD测试
1、insert添加
1.1、示例
//添加操作
@Test
public void add(){
    SysRole sysRole = new SysRole();
    sysRole.setRoleName("角色管理员1");
    sysRole.setRoleCode("role");
    sysRole.setDescription("角色管理员1");

    int insert = sysRoleMapper.insert(sysRole);
    System.out.println(insert);//影响行数
    System.out.println(sysRole.getId());
}
6.1.2、主键策略
1、ID_WORKER
MyBatis-Plus默认的主键策略是:ID_WORKER 全局唯一ID
2、自增策略
-
要想主键自增需要配置如下主键策略
-
-
需要在创建数据表的时候设置主键自增
-
实体字段中配置 @TableId(type = IdType.AUTO)
-
@TableId(type = IdType.AUTO)
private Long id;
其它主键策略:分析 IdType 源码可知
2、修改操作
@Test
public void update(){
    //根据id查询
    SysRole role = sysRoleMapper.selectById(10);
    //设置修改值
    role.setRoleName("atguigu角色管理员");
    //调用方法实现最终修改
    int rows = sysRoleMapper.updateById(role);
    System.out.println(rows);
}
3、删除操作
1、根据id删除
//删除操作
@Test
public void deleteById(){
    int rows = sysRoleMapper.deleteById(10);
    System.out.println(rows);
}
2、批量删除
//批量删除
@Test
public void testDeleteBatchIds() {
    int result = sysRoleMapper.deleteBatchIds(Arrays.asList(1, 9));
    System.out.println(result);
}
3、MyBatis-Plus条件构造器

Wrapper : 条件构造抽象类,最顶端父类
AbstractWrapper : 用于查询条件封装,生成 sql 的 where 条件
QueryWrapper : Entity 对象封装操作类,不是用lambda语法
UpdateWrapper : Update 条件封装,用于Entity对象更新操作
AbstractLambdaWrapper : Lambda 语法使用 Wrapper统一处理解析 lambda 获取 column。
LambdaQueryWrapper :看名称也能明白就是用于Lambda语法使用的查询Wrapper
LambdaUpdateWrapper : Lambda 更新封装Wrapper
注意:以下条件构造器的方法入参中的 column均表示数据库字段
//条件查询
@Test
public void restQuery1(){
    //创建QueryWrapper 对象,调用方法封装条件
    QueryWrapper<SysRole> wrapper = new QueryWrapper<>();
    wrapper.eq("role_name","管理员");
    //调用mp方法实现查询操作
    List<SysRole> list = sysRoleMapper.selectList(wrapper);
    System.out.println(list);
}

//条件查询
@Test
public void restQuery2(){
    //创建LambdaQueryWrapper 对象,调用方法封装条件
    LambdaQueryWrapper<SysRole> wrapper = new LambdaQueryWrapper<>();

    wrapper.eq(SysRole::getRoleName,"管理员");
    //调用mp方法实现查询操作
    List<SysRole> list = sysRoleMapper.selectList(wrapper);
    System.out.println(list);
}
其他条件构造可自行测试
4、knife4j
文档地址:Knife4j · 集Swagger2及OpenAPI3为一体的增强解决方案. | Knife4j
knife4j是为Java MVC框架集成Swagger生成Api文档的增强解决方案。
1、Swagger介绍
前后端分离开发模式中,api文档是最好的沟通方式。
Swagger 是一个规范和完整的框架,用于生成、描述、调用和可视化 RESTful 风格的 Web 服务。
1、及时性 (接口变更后,能够及时准确地通知相关前后端开发人员)
2、规范性 (并且保证接口的规范性,如接口的地址,请求方式,参数及响应格式和错误信息)
3、一致性 (接口信息一致,不会出现因开发人员拿到的文档版本不一致,而出现分歧)
4、可测性 (直接在接口文档上进行测试,以方便理解业务)
2、集成knife4j
knife4j属于service模块公共资源,因此我们集成到service-uitl模块
3.添加依赖
<dependency>
    <groupId>com.github.xiaoymin</groupId>
    <artifactId>knife4j-spring-boot-starter</artifactId>
</dependency>
4 添加knife4j配置类
package com.atguigu.common.config.knife4j;

import org.springframework.context.annotation.Bean;
import org.springframework.context.annotation.Configuration;
import springfox.documentation.builders.ApiInfoBuilder;
import springfox.documentation.builders.ParameterBuilder;
import springfox.documentation.builders.PathSelectors;
import springfox.documentation.builders.RequestHandlerSelectors;
import springfox.documentation.schema.ModelRef;
import springfox.documentation.service.ApiInfo;
import springfox.documentation.service.Contact;
import springfox.documentation.service.Parameter;
import springfox.documentation.spi.DocumentationType;
import springfox.documentation.spring.web.plugins.Docket;
import springfox.documentation.swagger2.annotations.EnableSwagger2WebMvc;

import java.util.ArrayList;
import java.util.List;

/**
 * @program: guigu-oa-perent
 * @description: knife4j配置信息
 * @author: Mr.Zhang
 * @create: 2023-04-06 11:40
 **/

@Configuration
@EnableSwagger2WebMvc
public class Knife4jConfig {

    @Bean
    public Docket adminApiConfig() {
        List<Parameter> pars = new ArrayList<>();
        ParameterBuilder tokenPar = new ParameterBuilder();
        tokenPar.name("token")
                .description("用户token")
                .defaultValue("")
                .modelRef(new ModelRef("string"))
                .parameterType("header")
                .required(false)
                .build();
        pars.add(tokenPar.build());
        //添加head参数end

        Docket adminApi = new Docket(DocumentationType.SWAGGER_2)
                .groupName("adminApi")
                .apiInfo(adminApiInfo())
                .select()
                //只显示admin路径下的页面
                .apis(RequestHandlerSelectors.basePackage("com.atguigu"))
                .paths(PathSelectors.regex("/admin/.*"))
                .build()
                .globalOperationParameters(pars);
        return adminApi;
    }

    private ApiInfo adminApiInfo() {

        return new ApiInfoBuilder()
                .title("后台管理系统-API文档")
                .description("本文档描述了后台管理系统微服务接口定义")
                .version("1.0")
                .contact(new Contact("atguigu", "http://atguigu.com", "2902352334@qq.com"))
                .build();
    }


}
5、 Controller层添加注解
package com.atguigu.auth.controller;

import com.atguigu.auth.service.SysRoleService;
import com.atguigu.common.result.Result;
import com.atguigu.model.system.SysRole;
import io.swagger.annotations.Api;
import io.swagger.annotations.ApiOperation;
import org.springframework.beans.factory.annotation.Autowired;
import org.springframework.web.bind.annotation.GetMapping;
import org.springframework.web.bind.annotation.RequestMapping;
import org.springframework.web.bind.annotation.RestController;

import java.util.List;

/**
 * @program: guigu-oa-perent
 * @description: TODO
 * @author: Mr.Zhang
 * @create: 2023-04-06 11:09
 **/
@Api(tags = "角色管理接口")
@RestController
@RequestMapping("/admin/system/sysRole")
public class SysRoleController {

    //路径
    //http://localhost:8800/admin/system/sysRole/findAll

    //注入service
    @Autowired
    private SysRoleService sysRoleService;

//    //查询所有角色
//    @GetMapping("/findAll")
//    public List<SysRole> finDAll(){
//        //调用service的方法
//        List<SysRole> list = sysRoleService.list();
//        return list;
//    }

    //统一返回数据结果
    @ApiOperation("查询所有的角色")
    @GetMapping("/findAll")
    public Result finDAll() {
        //调用service的方法
        List<SysRole> list = sysRoleService.list();
        return Result.ok(list);
    }

}
6、测试
http://localhost:8800/doc.html

5、分页查询
1、配置分页插件
说明:我们将@MapperScan("com.atguigu.auth.mapper")提取到该配置类上面,统一管理,启动类就不需要了。
package com.atguigu.common.config.mp;

import com.baomidou.mybatisplus.annotation.DbType;
import com.baomidou.mybatisplus.autoconfigure.ConfigurationCustomizer;
import com.baomidou.mybatisplus.extension.plugins.MybatisPlusInterceptor;
import com.baomidou.mybatisplus.extension.plugins.inner.PaginationInnerInterceptor;
import org.mybatis.spring.annotation.MapperScan;
import org.springframework.context.annotation.Bean;
import org.springframework.context.annotation.Configuration;
/**
 * @program: guigu-oa-perent
 * @description: 分页查询
 * @author: Mr.Zhang
 * @create: 2023-04-06 11:51
 **/
@Configuration
@MapperScan("com.atguigu.auth.mapper")
public class MybatisPlusConfig {

    /**
     * 新的分页插件,一缓和二缓遵循mybatis的规则,需要设置 MybatisConfiguration#useDeprecatedExecutor = false 避免缓存出现问题(该属性会在旧插件移除后一同移除)
     */
    @Bean
    public MybatisPlusInterceptor mybatisPlusInterceptor() {
        MybatisPlusInterceptor interceptor = new MybatisPlusInterceptor();
        interceptor.addInnerInterceptor(new PaginationInnerInterceptor(DbType.MYSQL));
        return interceptor;
    }

    @Bean
    public ConfigurationCustomizer configurationCustomizer() {
        return configuration -> configuration.setUseDeprecatedExecutor(false);
    }
}
2、分页controller
/**
 * 条件分页查询
 * @param page 当前页
 * @param limit 每页显示记录数
 * @param sysRoleQueryVo 条件对象
 * @return
 */
@ApiOperation("条件分页查询")
@GetMapping("{page}/{limit}")
public Result pageQueryRole(@PathVariable Long page,
                            @PathVariable Long limit,
                            SysRoleQueryVo sysRoleQueryVo) {
    //调用service的方法实现
    //1 创建Page对象,传递分页相关参数
    //page 当前页  limit 每页显示记录数
    Page<SysRole> pageParam = new Page<>(page, limit);

    //2 封装条件,判断条件是否为空,不为空进行封装
    LambdaQueryWrapper<SysRole> wrapper = new LambdaQueryWrapper<>();
    String roleName = sysRoleQueryVo.getRoleName();
    if (!StringUtils.isEmpty(roleName)) {
        //封装 like模糊查询
        wrapper.like(SysRole::getRoleName, roleName);
    }

    //3 调用方法实现
    IPage<SysRole> pageModel = sysRoleService.page(pageParam, wrapper);
    return Result.ok(pageModel);
}
3、测试

6、其他controller方法
说明:通过knife4j测试接口 大家可以去测试一下
/**
 * 添加角色
 *
 * @param role
 * @return
 */
@ApiOperation("添加角色")
@PostMapping("save")
public Result save(@RequestBody SysRole role) {
    //调用service放入方法
    boolean is_success = sysRoleService.save(role);
    if (is_success) {
        return Result.ok();
    } else {
        return Result.fail();
    }
}

/**
 * 修改角色-根据id查询
 *
 * @param id
 * @return
 */
@ApiOperation(value = "根据id查询")
@GetMapping("get/{id}")
public Result get(@PathVariable Long id) {
    SysRole sysRole = sysRoleService.getById(id);
    return Result.ok(sysRole);
}

/**
 * 修改角色
 *
 * @param role
 * @return
 */
@ApiOperation("修改角色")
@PutMapping("update")
public Result update(@RequestBody SysRole role) {
    //调用service放入方法
    boolean is_success = sysRoleService.updateById(role);
    if (is_success) {
        return Result.ok();
    } else {
        return Result.fail();
    }
}

/**
 * 根据id删除
 * @param id
 * @return
 */
@ApiOperation("根据id删除")
@DeleteMapping("remove/{id}")
public Result remove(@PathVariable Long id) {
    boolean is_success = sysRoleService.removeById(id);
    if (is_success) {
        return Result.ok();
    } else {
        return Result.fail();
    }
}

/**
 * 批量删除
 * @param idList
 * @return
 */
@ApiOperation("批量删除")
@DeleteMapping("batchRemove")
public Result batchRemove(@RequestBody List<Long> idList){
    boolean is_success = sysRoleService.removeByIds(idList);
    if (is_success) {
        return Result.ok();
    } else {
        return Result.fail();
    }
}
配置日期时间格式(不然测试响应的时间格式不一样)
application-dev.yml添加以下内容
  jackson:
    date-format: yyyy-MM-dd HH:mm:ss
    time-zone: GMT+8
7、统一异常处理

1、制造异常
除以0
int a = 10/0;

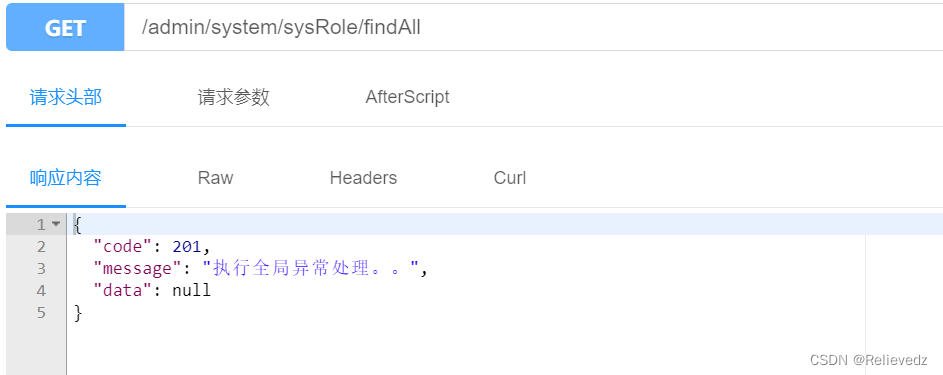
我们想让异常结果也显示为统一的返回结果对象,并且统一处理系统的异常信息,那么需要统一异常处理。
2、全局异常处理
2.1、创建统一异常处理器
package com.atguigu.common.config.execption;

import com.atguigu.common.result.Result;
import org.springframework.web.bind.annotation.ControllerAdvice;
import org.springframework.web.bind.annotation.ExceptionHandler;
import org.springframework.web.bind.annotation.ResponseBody;

/**
 * @program: guigu-oa-perent
 * @description: 全局异常处理类
 * @author: Mr.Zhang
 * @create: 2023-04-07 09:37
 **/
@ControllerAdvice
public class GlobalExceptionHandler {

    //全局异常处理,执行的方法
    @ExceptionHandler(Exception.class)
    @ResponseBody
    public Result error(){
        return Result.fail().message("执行了全局异常处理。。");
    }
}
测试:
3、处理特定异常
1、添加异常处理方法
GlobalExceptionHandler.java中添加
//特定异常处理
@ExceptionHandler(Exception.class)
@ResponseBody
public Result error(ArithmeticException e){
    e.printStackTrace();
    return Result.fail().message("执行了特定异常处理");
}
2、处理自定义异常
package com.atguigu.common.config.execption;

import com.atguigu.common.result.ResultCodeEnum;
import lombok.Data;

/**
 * @program: guigu-oa-perent
 * @description: 自定义全局异常类
 * @author: Mr.Zhang
 * @create: 2023-04-07 09:45
 **/
@Data
public class GuiguException extends RuntimeException {

    //状态码
    private Integer code;

    //描述信息
    private String message;

    /**
     * 通过状态码和错误消息创建异常对象
     *
     * @param code
     * @param message
     */
    public GuiguException(Integer code, String message) {
        super(message);
        this.code = code;
        this.message = message;
    }

    /**
     * 接收枚举类型对象
     *
     * @param resultCodeEnum
     */
    public GuiguException(ResultCodeEnum resultCodeEnum) {
        super(resultCodeEnum.getMessage());
        this.code = resultCodeEnum.getCode();
        this.message = resultCodeEnum.getMessage();
    }

    @Override
    public String toString() {
        return "GuliException{" +
                "code=" + code +
                ", message=" + this.getMessage() +
                '}';
    }
}
3、业务中需要位置抛出
//模拟异常效果
try {
    int i = 10/0;
}catch (Exception e){
    //抛出自定义异常
    throw new GuiguException(2001,"执行了自定义异常处理");
}
4、添加异常处理方法
//自定义异常处理
@ExceptionHandler(GuiguException.class)
@ResponseBody
public Result error(GuiguException e){
    e.printStackTrace();
    return Result.fail().code(e.getCode()).message(e.getMessage());
}
测试:

