发布jar到maven中央仓库
一、介绍
我们平时都会使用search.maven.org 去搜索某个工具包的最新版本。但是开发了很多年,我们自己也可能能沉淀出一些东西或者工具包需要发布来供别人使用,或者方便自己使用。那么我们也可以发布自己的东西到maven中央仓库。
二、创建ISSUE
然后我们在support 的地方能看到相关介绍。
https://central.sonatype.org/pages/support/#producers

然后我们顺着痕迹,就找到了 OSSRH Issue Tracker
然后我们点进去就看到好多人的提交。我们 依样画葫芦。

后边还有几个关键点要填写一下

如果你是自己的网址 需要添加一个TXT记录,操作如下。
How do I set the TXT record needed to prove ownership of my Web Domain? - The Central Repository Documentation
这个TXT的记录值 就是你提交新建的 jira issue 的问题号码

通过如下命令可以查看:
Resolve-DnsName yourdomain.com -Type TXT
审核完成后它会关闭你的issue,或者有什么问题它会告知你,你解决后需要重新打开issue。
三、GPG安装与生成
1. GPG签名
如果你没有设置过GPG签名,需要设置。
首先下载GPG工具
www.gnupg.org/download/
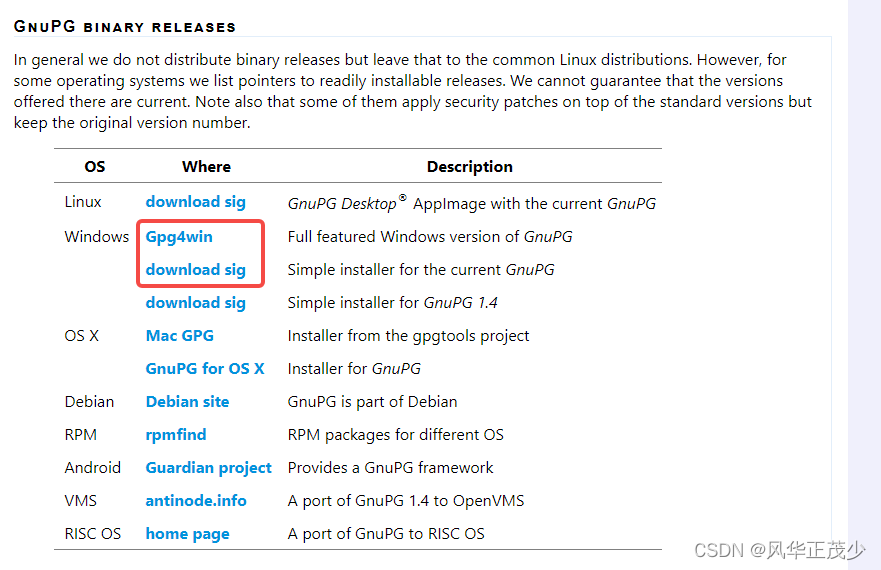
选择其中一个即可
执行一下脚本
gpg --generate-key
生成之后会填写一些个人信息
中间会填写一个passphrase,这个要记住。
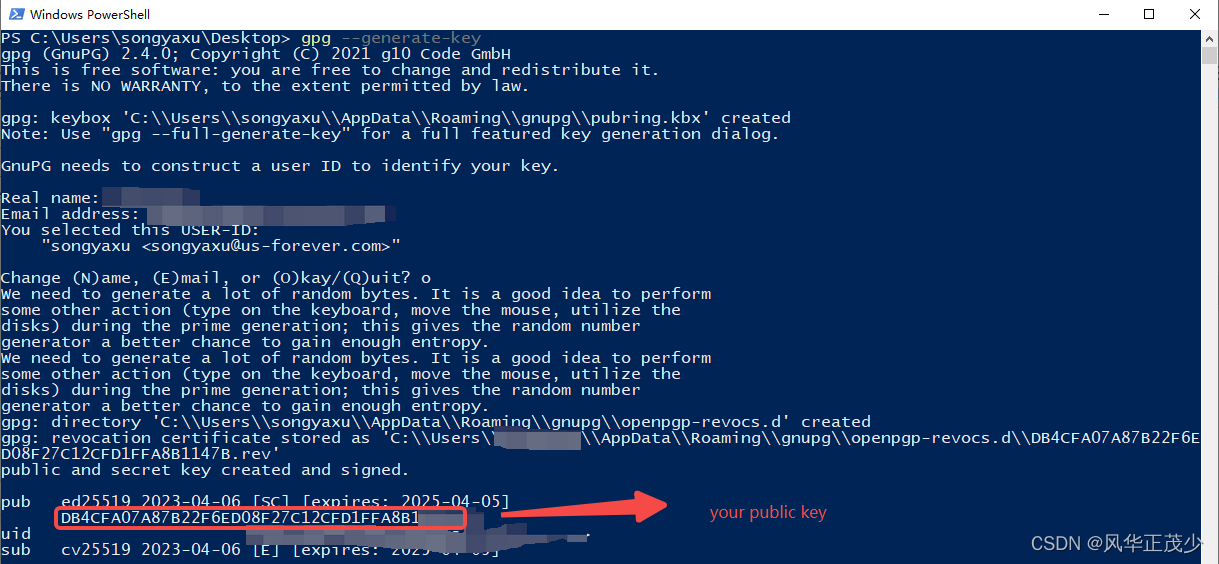
2. GPG签名上传
可以选择以下三个任意一个即可。
gpg --keyserver keyserver.ubuntu.com --send-keys 【your public key】
gpg --keyserver keys.openpgp.org --send-keys 【your public key】
gpg --keyserver pgp.mit.edu --send-keys 【your public key】
通过以下命令校验是否成功
gpg --keyserver keyserver.ubuntu.com --recv-keys 【your public key】
gpg --keyserver keys.openpgp.org  --recv-keys 【your public key】
gpg --keyserver pgp.mit.edu --recv-keys 【your public key】
四、settings.xml设置
<profiles>
    <profile>
      <id>sonatype</id>
      <properties>
        <gpg.executable>gpg</gpg.executable>
        <gpg.passphrase>passphrase密码</gpg.passphrase>
      </properties>
    </profile>
  </profiles>
<servers>
    <server>
      <id>sonatype</id>
      <username>sonatype账号</username>
      <password>sonatype密码</password>
    </server>
</servers>
五、pom.xml配置
<groupId>com.us-forever</groupId>
    <artifactId>tinyint-resolver</artifactId>
    <version>1.0</version>
    <name>tinyint-resolver</name>
    <description>The type converter from byte to int in Mybatis-Generator</description>
    <url>https://github.com/songyaxu/tinyint-resolver</url>
    <licenses>
        <license>
            <name>The Apache License, Version 2.0</name>
            <url>http://www.apache.org/licenses/LICENSE-2.0.txt</url>
        </license>
    </licenses>
<!--   开发人员信息         -->
    <developers>
        <developer>
            <name>姓名</name>
            <email>邮箱</email>
            <roles>
                <role>developer</role>
            </roles>
            <timezone>+8</timezone>
        </developer>
    </developers>
<!--   项目仓库信息         -->
    <scm>
        <connection>scm:git:https://github.com/songyaxu/tinyint-resolver.git</connection>
       <developerConnection>scm:git:https://github.com/songyaxu/tinyint-resolver.git</developerConnection>
        <url>https://github.com/songyaxu/tinyint-resolver</url>
        <tag>v${project.version}</tag>
    </scm>
<!--   指定打包上传的目标url         -->
    <distributionManagement>
        <snapshotRepository>
            <!--   这个id需要和settings.xml里面的id一致         -->
            <id>sonatype</id>
            <url>https://s01.oss.sonatype.org/content/repositories/snapshots/</url>
        </snapshotRepository>
        <repository>
          <!--   这个id需要和settings.xml里面的id一致         -->
            <id>sonatype</id>
            <url>https://s01.oss.sonatype.org/service/local/staging/deploy/maven2/</url>
        </repository>
    </distributionManagement>
<!-- 编译工具 -->
    <build>
        <plugins>
            <!-- Source -->
            <plugin>
                <groupId>org.apache.maven.plugins</groupId>
                <artifactId>maven-source-plugin</artifactId>
                <version>3.2.1</version>
                <executions>
                    <execution>
                        <phase>package</phase>
                        <goals>
                            <goal>jar-no-fork</goal>
                        </goals>
                    </execution>
                </executions>
            </plugin>
            <!-- Javadoc工具 -->
            <plugin>
                <groupId>org.apache.maven.plugins</groupId>
                <artifactId>maven-javadoc-plugin</artifactId>
                <version>3.5.0</version>
                <configuration>
                    <additionalJOptions>
                        <additionalJOption>-Xdoclint:none</additionalJOption>
                    </additionalJOptions>
                </configuration>
                <executions>
                    <execution>
                        <phase>package</phase>
                        <goals>
                            <goal>jar</goal>
                        </goals>
                    </execution>
                </executions>
            </plugin>
            <!-- GPG -->
            <plugin>
                <groupId>org.apache.maven.plugins</groupId>
                <artifactId>maven-gpg-plugin</artifactId>
                <version>3.0.1</version>
                <configuration>
                    <gpgArguments>
                        <arg>--pinentry-mode</arg>
                        <arg>loopback</arg>
                    </gpgArguments>
                </configuration>
                <executions>
                    <execution>
                        <id>sign-artifacts</id>
                        <phase>verify</phase>
                        <goals>
                            <goal>sign</goal>
                        </goals>
                    </execution>
                </executions>
            </plugin>
        </plugins>
    </build>
六、上传发布
mvn clean deploy -Dgpg.passphrase-[passphrase密码]
执行成功后登录你的地址:
https://s01.oss.sonatype.org/#stagingRepositories
登录后点击左侧的stagingRepositories
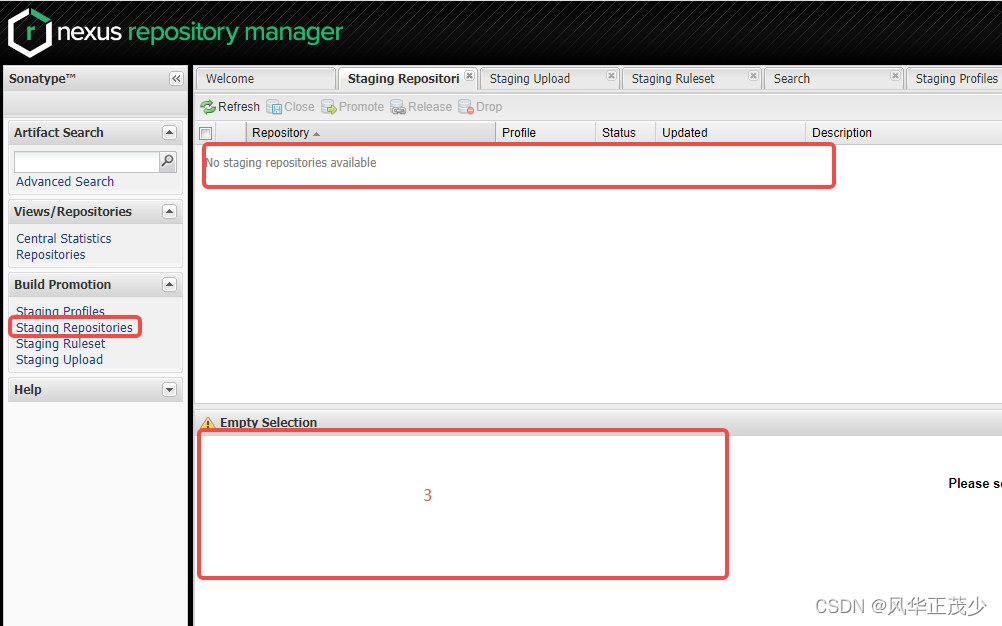
然后会在右侧展示你上传的包,有可能会有几分钟延迟。
选中后会看到图片3的位置会展示具体校验信息,没有错误就点击上边的close。
close成功后,可以进行release操作。
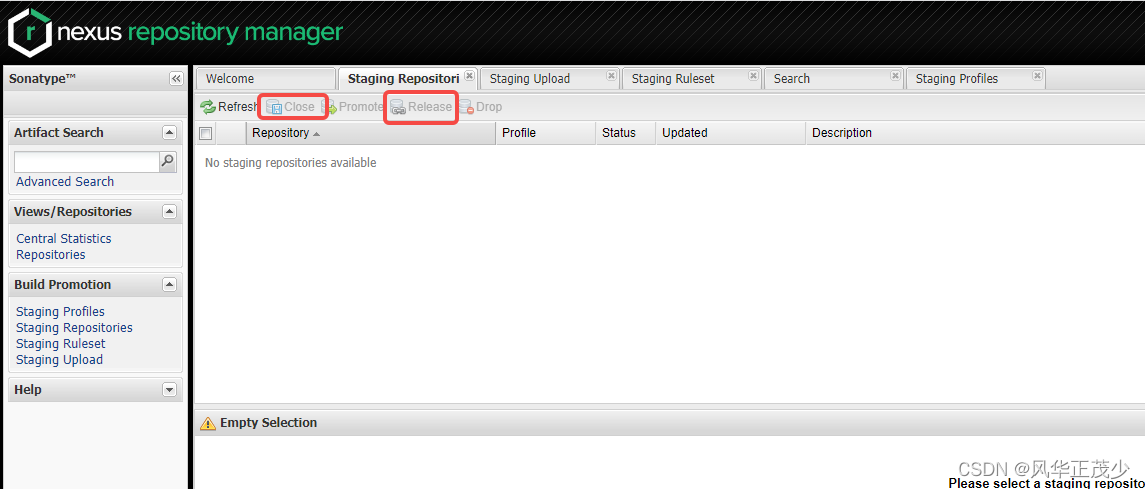
操作完成后就可以在advanced search搜索到自己的jar包了。
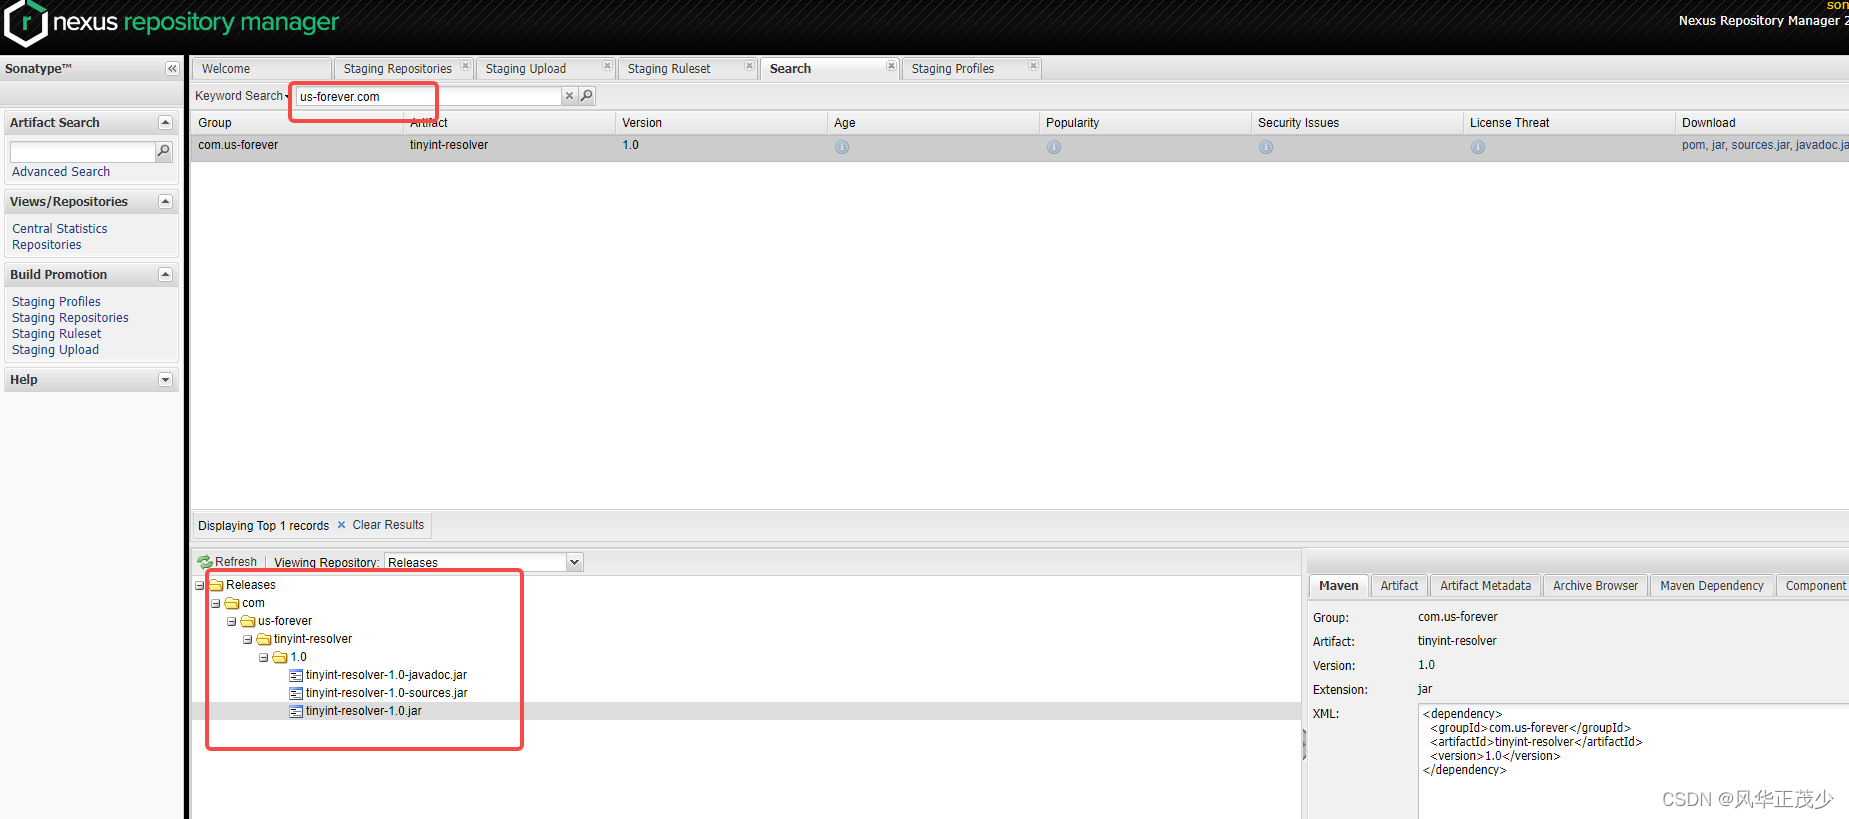
过一段时间(大概4个小时左右)后就可以在search.maven.org搜索到自己的工具包了!
