WPF —— 控件模版和数据模版
1:控件模版简介:
自定义控件模版:自己添加的样式、标签,控件模版也是属于资源的一种,
每一个控件模版都有一唯一的 key,在控件上通过template属性进行绑定
什么场景下使用自定义控件模版,当项目里面多个地方使用到相同效果,这时候可以把相同
效果封装成一个自定义模版,例如项目好几个地方需要一个弧度并且鼠标放上去效果是红色等按钮。就可以
把按钮从新自定义一下。
2:关于控件模版的实例
<Window.Resources>
    <!--自定义模版-->
    <ControlTemplate x:Key="c1" TargetType="Button" >
        <Border Background="AliceBlue"
                CornerRadius="5"
                BorderThickness="2"
                x:Name="border">
            <!--ContentPresenter 呈现内容的标签-->
            <StackPanel Orientation="Horizontal">
                <TextBlock VerticalAlignment="Center"
                           Margin="0,0,10,0"
                           Name="t1"
                           Text="☆"></TextBlock>
                <ContentPresenter HorizontalAlignment="Center"
                                  VerticalAlignment="Center">
                </ContentPresenter>
            </StackPanel>
        </Border>
        <!--Triggers 设置触发 鼠标移去 鼠标移开等效果-->
        <ControlTemplate.Triggers>
            <!--Property 设置的属性
            Value 属性值-->
            <!--IsMouseOver 鼠标放上去
             TargetName="border" 目标元素的name属性
            -->
            <Trigger Property="IsMouseOver"
                     Value="true">
                <Setter Property="Background"
                        Value="red"
                        TargetName="border">

                </Setter>
                <Setter Property="BorderBrush"
                        Value="green"
                        TargetName="border">

                </Setter>
                <Setter Property="Text"
                        Value="★"
                        TargetName="t1">
                </Setter>
            </Trigger>
        </ControlTemplate.Triggers>
    </ControlTemplate>
</Window.Resources>

<Grid>
        <!--WPF不仅支持传统winfrom编程,并且还引入以模版为核心的新一代设计理念,在wpf通过使用模版
    将数据和界面进行解耦。模版主要分为俩大类型的模版:数据模版【DataTemplate】 和
    控件模版【Control Template】,
    控件模版:描述如何显示控件,
    数据模版:描述如何显示数据,-->

    <!--<Button Width="100" Height="40" Content="hello world"></Button>-->
    <Button Template="{StaticResource c1}" Width="100" Height="40" Content="删除" >
    </Button>
    <Button Template="{StaticResource c1}"
            Width="100"
            Height="40"
            Content="编辑"
            Margin="0,0,0,100">
    </Button>

</Grid>
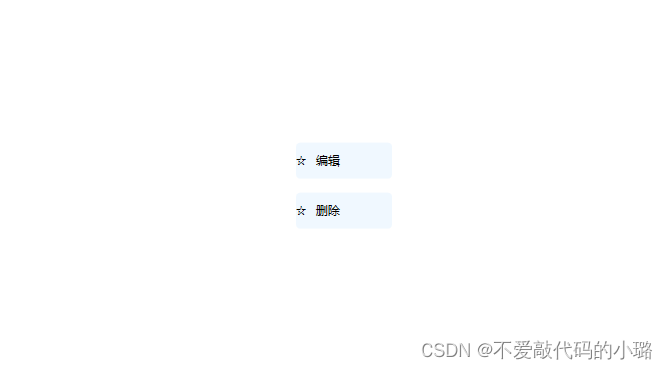
效果图如下

1关于数据模板的简介:
数据模版 DataTemplate:决定了数据展示形式和用户体验,在控件上通过使用ItemTemplate
属性进行模版的绑定 ItemTemplate="{StaticResource c1}
控件模版 ControlTemplate:设置控件展示,在控件上通过使用Template属性进行模版绑定
Template="{StaticResource c1}
2 关于它的实例
 <Window.Resources>
     <DataTemplate x:Key="c1">
         <StackPanel Orientation="Horizontal">
             <Border Width="10" Height="10"
                     Background="{Binding Code}">
             </Border>
             <TextBlock Text="{Binding Code}"> </TextBlock>

         </StackPanel>
     </DataTemplate>
 </Window.Resources>

 <Grid>
     <ListBox Width="200"
              Height="100"
              HorizontalAlignment="Left"
              VerticalAlignment="Top"
              ItemTemplate="{StaticResource c1}"
              Name="l1">

     </ListBox>
     <ComboBox Width="200"
               Height="40"
               ItemTemplate="{StaticResource c1}"
               Name="com"
               >
     </ComboBox>

     <!--这是之前的itemsource的写法-->
     <ListBox Width="200"
              Height="100"
              HorizontalAlignment="Left"
              VerticalAlignment="Top"
              ItemsSource="{Binding}"
              Margin="300,0,0,0"
              Name="l3">
         <ListBox.ItemTemplate>
             <DataTemplate>
                 <StackPanel Orientation="Horizontal">
                     <Border Width="10"
                             Height="10"
                             Background="{Binding Code}">
                     </Border>
                     <TextBlock Text="{Binding Code}"></TextBlock>
                 </StackPanel>
             </DataTemplate>
         </ListBox.ItemTemplate>
     </ListBox>

 </Grid>
定义模型类
    public Window数据模版()
    {
        InitializeComponent();
        List<Color> list = new List<Color>(); //数据源集合
        list.Add(new Color() {
            Code = "#ff0000"
        });
        list.Add(new Color()
        {
            Code = "#00ff00"
        });
        list.Add(new Color()
        {
            Code = "#00FF00"
        });
        list.Add(new Color()
        {
            Code = "#55efc4"
        });
        list.Add(new Color()
        {
            Code = "#FBCA11"
        });
        this.l1.ItemsSource = list;
        this.com.ItemsSource = list;

        //之前的数据绑定的写法
        this.l3.ItemsSource = list;
       // this.l3.DisplayMemberPath = "Code";


    }
}

 // 模型类
public class Color
{
    public string Code {  get; set; }//颜色的取值#FF0000
}