【libGDX】Mesh纹理贴图
1 前言
纹理贴图的本质是将图片的纹理坐标与模型的顶点坐标建立一一映射关系。纹理坐标的 x、y 轴正方向分别朝右和朝下,如下。

2 纹理贴图
本节将使用 Mesh、ShaderProgram、Shader 实现纹理贴图,OpenGL ES 的实现见博客 → 纹理贴图,本节完整代码资源见 → libGDX Mesh纹理贴图。
DesktopLauncher.java
package com.zhyan8.game;

import com.badlogic.gdx.backends.lwjgl3.Lwjgl3Application;
import com.badlogic.gdx.backends.lwjgl3.Lwjgl3ApplicationConfiguration;
import com.zhyan8.game.Chartlet;

public class DesktopLauncher {
	public static void main (String[] arg) {
		Lwjgl3ApplicationConfiguration config = new Lwjgl3ApplicationConfiguration();
		config.setForegroundFPS(60);
		config.setTitle("Chartlet");
		new Lwjgl3Application(new Chartlet(), config);
	}
}
Chartlet.java
package com.zhyan8.game;

import com.badlogic.gdx.ApplicationAdapter;
import com.badlogic.gdx.Gdx;
import com.badlogic.gdx.graphics.GL30;
import com.badlogic.gdx.graphics.Mesh;
import com.badlogic.gdx.graphics.Texture;
import com.badlogic.gdx.graphics.VertexAttribute;
import com.badlogic.gdx.graphics.VertexAttributes.Usage;
import com.badlogic.gdx.graphics.glutils.ShaderProgram;

public class Chartlet extends ApplicationAdapter {
	private ShaderProgram mShaderProgram;
	private Mesh mMesh;
	private Texture mTexture;

	@Override
	public void create() {
		initShader();
		initMesh();
		mTexture = new Texture(Gdx.files.internal("textures/girl.jpg"));
	}

	@Override
	public void render() {
		Gdx.gl.glClearColor(0.455f, 0.725f, 1.0f, 1.0f);
		Gdx.gl.glClear(GL30.GL_COLOR_BUFFER_BIT);
		mShaderProgram.bind();
		// mShaderProgram.setUniformi("u_texture", 0); // 设置纹理单元
		mTexture.bind(0);
		mMesh.render(mShaderProgram, GL30.GL_TRIANGLE_FAN);
	}

	@Override
	public void dispose() {
		mShaderProgram.dispose();
		mMesh.dispose();
	}

	private void initShader() { // 初始化着色器程序
		String vertex = Gdx.files.internal("shaders/chartlet_vertex.glsl").readString();
		String fragment = Gdx.files.internal("shaders/chartlet_fragment.glsl").readString();
		mShaderProgram = new ShaderProgram(vertex, fragment);
	}

	private void initMesh() { // 初始化网格
		float[] vertices = {
				-1f, -1f, 0f, 0f, 1f, // 左下
				1f, -1f, 0f, 1f, 1f, // 右下
				1f, 1f, 0f, 1f, 0f, // 右上
				-1f, 1f, 0f, 0f, 0f // 左上
		};
		short[] indices = {0, 1, 2, 3};
		VertexAttribute vertexPosition = new VertexAttribute(Usage.Position, 3, "a_position");
		VertexAttribute texCoords = new VertexAttribute(Usage.TextureCoordinates, 2, "a_texCoord0");
		mMesh = new Mesh(true, vertices.length / 5, indices.length, vertexPosition, texCoords);
		mMesh.setVertices(vertices);
		mMesh.setIndices(indices);
	}
}
chartlet_vertex.glsl
#version 300 es

in vec3 a_position;
in vec2 a_texCoord0;

out vec2 v_texCoord0;

void main() {
    gl_Position = vec4(a_position, 1.0);
    v_texCoord0 = a_texCoord0;
}
chartlet_fragment.glsl
#version 300 es
precision mediump float; // 声明float型变量的精度为mediump

in vec2 v_texCoord0;

uniform sampler2D u_texture;

out vec4 fragColor;

void main() {
    fragColor = texture(u_texture, v_texCoord0);
}
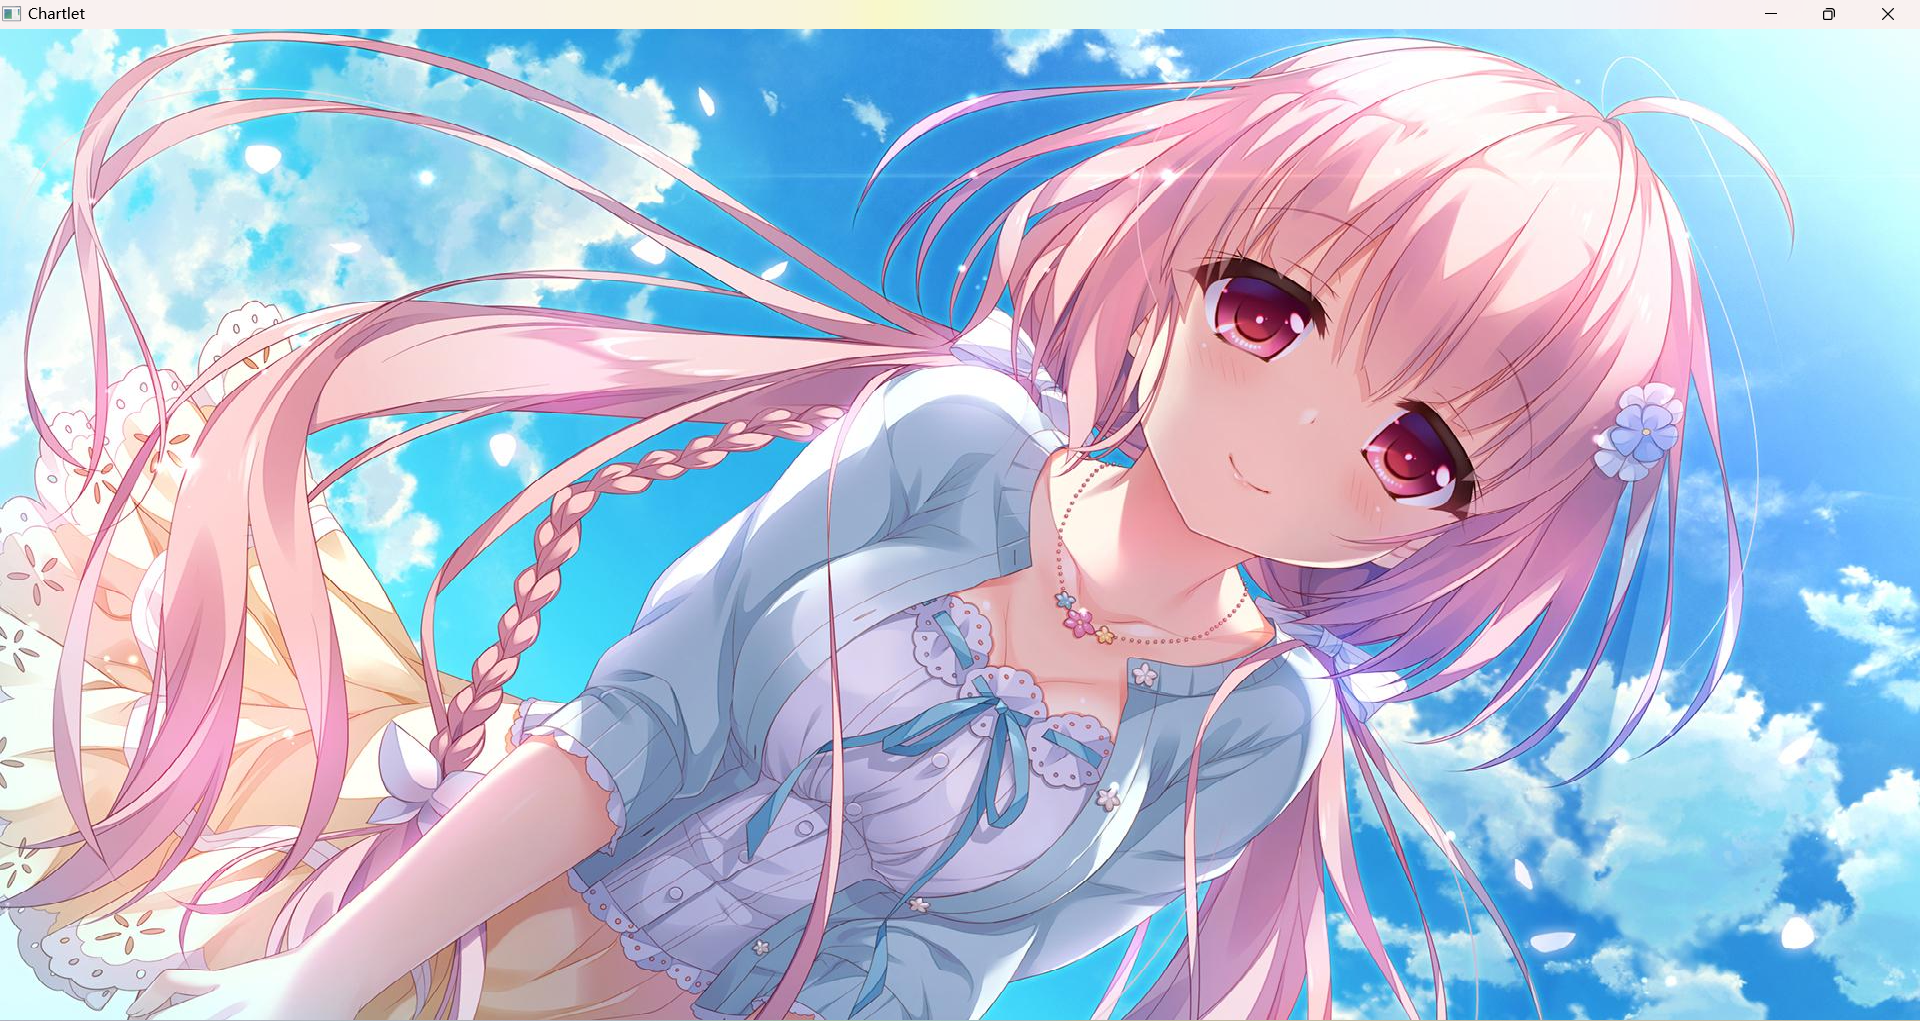
运行效果。

