Ubuntu22.04 gnome-builder gnome C 应用程序习练笔记(二)
gnome-builder创建的程序,在工程树中有三个重要程序:main主程序、application应用程序和window主窗口程序。main整个程序的起始,它会操作application生产应用环境,application会操作window生成主窗口,于是就有了 application 和 window 的 handle,驾驭整个程序的运行。

新的主窗口生成,主要改动 withcambla-window.c 的内容,其它的暂时先不用动。
1- 改动窗体结构,将用到的widget全部放入窗体结构中(初创时只有个label)。
struct _WithcamblaWindow
{
  GtkApplicationWindow  parent_instance;

  /* Template widgets */
  GtkHeaderBar        *header_bar;
  GtkLabel            *label1;
  GtkButton           *button1;
  GtkButton           *button2;
  GtkButton           *button3;
  GtkGrid             *grid1;
};
2- 将widget绑定到template上
static void
withcambla_window_class_init (WithcamblaWindowClass *klass)
{
  GtkWidgetClass *widget_class = GTK_WIDGET_CLASS (klass);

  gtk_widget_class_set_template_from_resource (widget_class, "/org/mongnewer/test/withcambla-window.ui");
  gtk_widget_class_bind_template_child (widget_class, WithcamblaWindow, header_bar);
  gtk_widget_class_bind_template_child (widget_class, WithcamblaWindow, label1);
  gtk_widget_class_bind_template_child (widget_class, WithcamblaWindow, button1);
  gtk_widget_class_bind_template_child (widget_class, WithcamblaWindow, button2);
  gtk_widget_class_bind_template_child (widget_class, WithcamblaWindow, button3);
  gtk_widget_class_bind_template_child (widget_class, WithcamblaWindow, grid1);
}
3- 在窗口初始化中加入widget控制信号,建立起widget事件关系。
static void
withcambla_window_init (WithcamblaWindow *self)
{
  gtk_widget_init_template (GTK_WIDGET (self));


  g_signal_connect(GTK_BUTTON(self->button1), "clicked", G_CALLBACK(on_button1_click), self);
  g_signal_connect(GTK_BUTTON(self->button2), "clicked", G_CALLBACK(on_button2_click), self);
  g_signal_connect(GTK_BUTTON(self->button3), "clicked", G_CALLBACK(on_button3_click), self);
}
至此,主窗口程序就改动好了。
button1_click回调函数,在label上显示 hello 字样,因主使用markup, 不需要 pango 了。
static void
on_button1_click(GtkWidget *widget, WithcamblaWindow *self)
{
  gtk_label_set_markup (GTK_LABEL(self->label1),
                       "<span foreground='red' underline='single' underline_color='blue' font_desc='Times italic 48'>Hello!</span>");

  GtkWidget *inlabel = gtk_button_get_child(GTK_BUTTON(self->button1));
  gtk_label_set_markup (GTK_LABEL(inlabel),
                       "<span foreground='red' underline='single' underline_color='blue' font_desc='Times italic 48'>Hello!</span>");
}
button2_click回调函数,用程序方式直接写出一个窗体并作为主窗体的子窗体显示。
static void
on_button2_click(GtkWidget *widget, GtkWindow *self)
{
  GtkWidget *window = gtk_window_new ();
  gtk_window_set_default_size (GTK_WINDOW(window), 600, 400);
  gtk_window_set_title (GTK_WINDOW(window), "A popup window by button_click");
  GtkWidget *box = gtk_box_new(GTK_ORIENTATION_VERTICAL, 10);
  gtk_box_set_homogeneous (GTK_BOX(box), TRUE);
  gtk_window_set_child (GTK_WINDOW(window), GTK_WIDGET(box));
  GtkWidget *button = gtk_button_new_with_label("Pressed!");
  gtk_widget_set_visible (GTK_WIDGET(button), TRUE);

  g_signal_connect(G_OBJECT(button), "clicked", G_CALLBACK(closewindow), window);
  g_signal_connect(G_OBJECT(window), "destroy", G_CALLBACK(closewindow), window);

  GtkWidget *spacer1 = gtk_label_new("");
  gtk_box_append (GTK_BOX(box), GTK_WIDGET(spacer1));
  gtk_box_append (GTK_BOX(box), GTK_WIDGET(button));
  GtkWidget *spacer2 = gtk_label_new("");
  gtk_box_append (GTK_BOX(box), GTK_WIDGET(spacer2));

  gtk_window_set_resizable (GTK_WINDOW(window), FALSE);
  gtk_window_set_modal (GTK_WINDOW(window), TRUE);

  gtk_window_set_transient_for (GTK_WINDOW(window), GTK_WINDOW(self));
  gtk_widget_set_visible(window, TRUE);
}
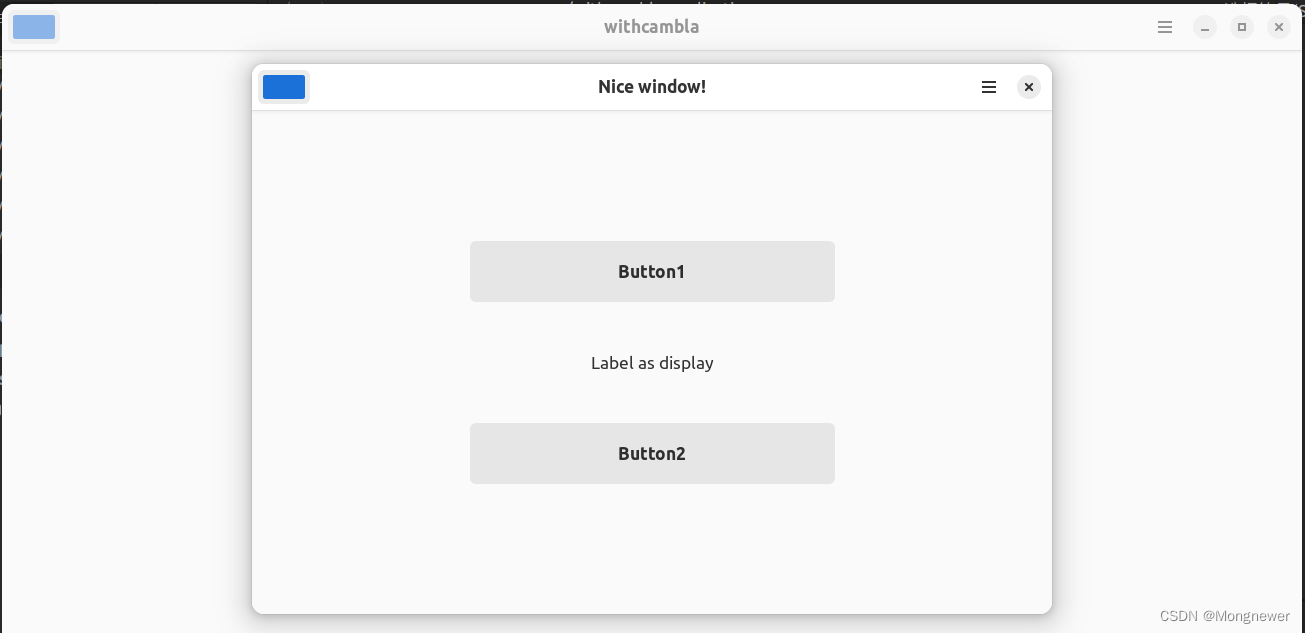
button3_click回调函数,产生一个TEST_TYPE_WINDOW定义的子窗口并作为主窗口的子窗口显示。它不是由程序代码实现的,而是由 ui 文件实现的,需要另外的popwindowf.h和popwindowf.c实现。如果只是简单窗口,这种方式比直接代码实现窗口显得啰嗦一些。
static void
on_button3_click(GtkWidget *widget, GtkWindow *self)
{
  GtkWindow *window;
    window = g_object_new (TEST_TYPE_WINDOW,
                           "default-height", 550, "default-width", 800,
                           "title", "Nice window!",
                           NULL);

  gtk_window_set_transient_for (window, self);
  gtk_window_present (window);
}
代码实现的子窗口

ui实现的子窗口(直接改了一下主窗口的ui,它们看上去很相似)

七、用菜单命令操作实现上述两个子窗口
菜单项操作与button信号操作有些不同,首先在主窗口的ui中加上新的菜单项。app.ghello, app.popwin1, app.popwin2
  <menu id="primary_menu">
    <section>
      <item>
        <attribute name="action">app.preferences</attribute>
        <attribute name="label" translatable="yes">_Preferences</attribute>
      </item>
      <item>
        <attribute name="action">win.show-help-overlay</attribute>
        <attribute name="label" translatable="yes">_Keyboard Shortcuts</attribute>
      </item>
      <item>
        <attribute name="action">app.about</attribute>
        <attribute name="label" translatable="yes">_About gnomeapp</attribute>
      </item>
      <item>
        <attribute name="action">app.ghello</attribute>
        <attribute name="label" translatable="yes">_gPrint Hello</attribute>
      </item>
      <item>
        <attribute name="action">app.popwin</attribute>
        <attribute name="label" translatable="yes">_popup window</attribute>
      </item>
      <item>
        <attribute name="action">app.popwin1</attribute>
        <attribute name="label" translatable="yes">_popup window 1</attribute>
      </item>
      <item>
        <attribute name="action">app.popwin2</attribute>
        <attribute name="label" translatable="yes">_popup window 2</attribute>
      </item>
    </section>
  </menu>
菜单项的操作是withcambla-application.c初始化时关联的,它们都要挂到action map上去,然后与回调函数建立联系,快捷键也是在这个地方关联的。
static void
withcambla_application_init (WithcamblaApplication *self)
{
  g_autoptr (GSimpleAction) quit_action = g_simple_action_new ("quit", NULL);
  g_signal_connect_swapped (quit_action, "activate", G_CALLBACK (g_application_quit), self);
  g_action_map_add_action (G_ACTION_MAP (self), G_ACTION (quit_action));

  g_autoptr (GSimpleAction) about_action = g_simple_action_new ("about", NULL);
  g_signal_connect (about_action, "activate", G_CALLBACK (withcambla_application_show_about), self);
  g_action_map_add_action (G_ACTION_MAP (self), G_ACTION (about_action));

  g_autoptr (GSimpleAction) ghello_action = g_simple_action_new ("ghello", NULL);
  g_signal_connect (ghello_action, "activate", G_CALLBACK (ghello), self);
  g_action_map_add_action (G_ACTION_MAP (self), G_ACTION (ghello_action));

  g_autoptr (GSimpleAction) popwin_action = g_simple_action_new ("popwin", NULL);
  g_signal_connect (popwin_action, "activate", G_CALLBACK (popwin), self);
  g_action_map_add_action (G_ACTION_MAP (self), G_ACTION (popwin_action));

  g_autoptr (GSimpleAction) popwin1_action = g_simple_action_new ("popwin1", NULL);
  g_signal_connect (popwin1_action, "activate", G_CALLBACK (popwin1), self);
  g_action_map_add_action (G_ACTION_MAP (self), G_ACTION (popwin1_action));

  g_autoptr (GSimpleAction) popwin2_action = g_simple_action_new ("popwin2", NULL);
  g_signal_connect (popwin2_action, "activate", G_CALLBACK (popwin2), self);
  g_action_map_add_action (G_ACTION_MAP (self), G_ACTION (popwin2_action));

  gtk_application_set_accels_for_action (GTK_APPLICATION (self),
                                         "app.ghello",
                                         (const char *[]) {
                                           "<Control><Super><Alt>h",
                                           NULL,
                                         });

  gtk_application_set_accels_for_action (GTK_APPLICATION (self),
                                         "app.quit",
                                         (const char *[]) {
                                           "<primary>q",
                                           NULL,
                                         });
}
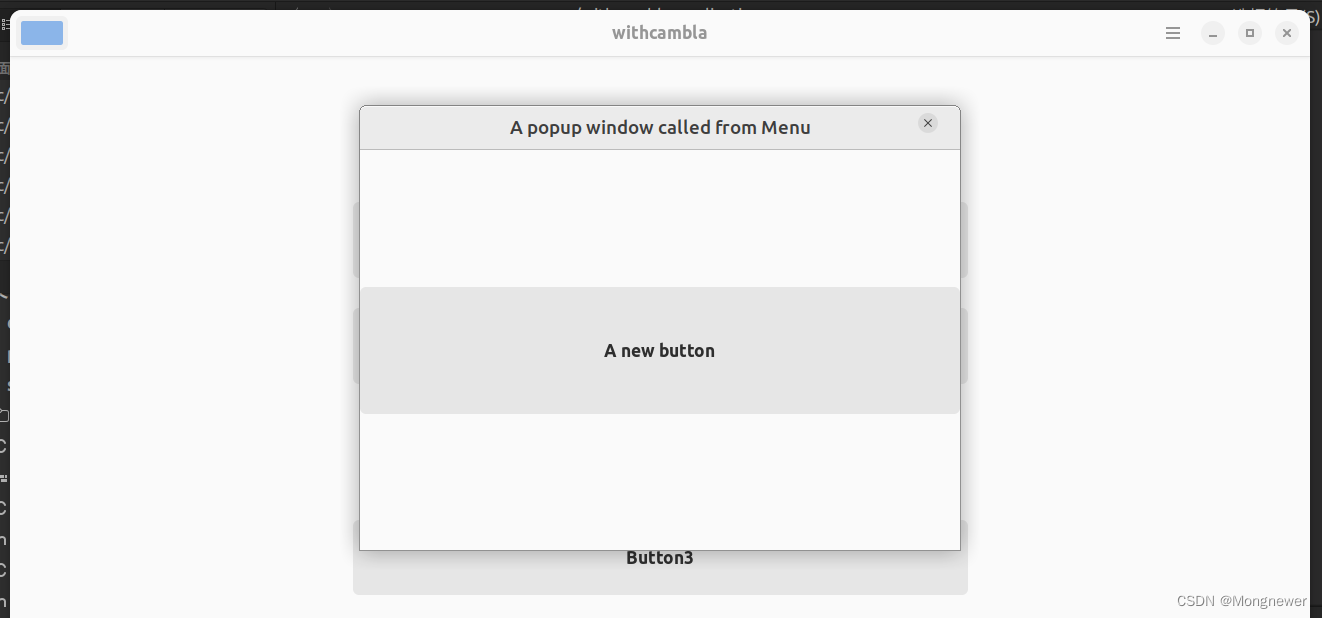
popwin回调函数,用代码创建子窗体,可以用button创建的好个,习练时也可以考贝一个改一下用。
static void
popwin(GSimpleAction *action,
        GVariant     *parameter,
        gpointer      user_data)
{
  WithcamblaApplication *self = WITHCAMBLA_APPLICATION (user_data);
  GtkWindow *windowapp = gtk_application_get_active_window (GTK_APPLICATION (self));
  GtkWidget *window = gtk_window_new ();
  gtk_window_set_default_size (GTK_WINDOW(window), 600, 400);
  gtk_window_set_title (GTK_WINDOW(window), "A popup window called from Menu");
  //gtk_window_set_application (GTK_WINDOW(window), GTK_APPLICATION (self));
  GtkWidget *box = gtk_box_new (GTK_ORIENTATION_VERTICAL, 10);
  gtk_box_set_homogeneous (GTK_BOX(box), TRUE);
  gtk_window_set_child (GTK_WINDOW(window), GTK_WIDGET(box));
  GtkWidget *button = gtk_button_new_with_label("A new button");
  gtk_widget_set_visible (GTK_WIDGET(button), TRUE);

  g_signal_connect(G_OBJECT(button), "clicked", G_CALLBACK(closewindow), window);
  g_signal_connect(G_OBJECT(window), "destroy", G_CALLBACK(closewindow), window);

  GtkWidget *spacer1 = gtk_label_new("");
  gtk_box_append (GTK_BOX(box), GTK_WIDGET(spacer1));
  gtk_box_append (GTK_BOX(box), GTK_WIDGET(button));
  GtkWidget *spacer2 = gtk_label_new("");
  gtk_box_append (GTK_BOX(box), GTK_WIDGET(spacer2));

  gtk_window_set_resizable (GTK_WINDOW(window), FALSE);
  gtk_window_set_modal (GTK_WINDOW(window), TRUE);

  gtk_window_set_transient_for (GTK_WINDOW(window), GTK_WINDOW(windowapp));
  gtk_widget_set_visible(window, TRUE);
}
popwin1回调函数是通过测试调用一个子过程,由子过程代码创建的子窗口。
static void
popwin1(GSimpleAction *action,
        GVariant     *parameter,
        gpointer      user_data)
{
  WithcamblaApplication *self = WITHCAMBLA_APPLICATION (user_data);
  GtkWindow *windowapp = gtk_application_get_active_window (GTK_APPLICATION (self));
  popwinsub(NULL, windowapp);
}
popwin2回调函数,是调用popwindowf.h和popwindowf.c程序实现的。
static void
popwin2(GSimpleAction *action,
        GVariant      *parameter,
        gpointer       user_data)
{
  WithcamblaApplication *self = WITHCAMBLA_APPLICATION (user_data);
  GtkWindow *windowapp = gtk_application_get_active_window (GTK_APPLICATION (self));

  //popwinsubf(NULL, windowapp);
  /* Get the current window or create one if necessary. */

  GtkWindow *window;
    window = g_object_new (TEST_TYPE_WINDOW,
                           "default-height", 550, "default-width", 800,
                           "title", "Nice window!",
                           NULL);

  gtk_window_set_transient_for (window, windowapp);

  /* Ask the window manager/compositor to present the window. */
  gtk_window_present (window);
}
还有些内容写在下篇笔记中
