博客搭建之路:next主题修改侧边栏icon
文章目录
- next主题修改侧边栏icon
next主题修改侧边栏icon
next主题中使用的是由 Font Awesome提供的图标,对于国内应用的图标基本都不支持。为了实现侧边栏小图标的展示,只能自己来设置样式了。
从iconfont来下载自己需要的icon,选择svg格式下载,并将文件保存在source\images目录下。
next主题提供了自定义样式的口子,在next下的_config.yml配置文件中有custom_file_path,可以用来进行自定义配置
custom_file_path:
  #head: source/_data/head.swig
  #header: source/_data/header.swig
  #sidebar: source/_data/sidebar.swig
  #postMeta: source/_data/post-meta.swig
  #postBodyEnd: source/_data/post-body-end.swig
  #footer: source/_data/footer.swig
  #bodyEnd: source/_data/body-end.swig
  #variable: source/_data/variables.styl
  #mixin: source/_data/mixins.styl
  style: source/_data/styles.styl
把style的注释放开,然后在对应目录下创建对应的styles.styl
以csdn为例,在styles.styl文件中新增csdn样式
.csdn {
/* csdn.svg 位置*/
	background-image: url('/images/csdn.svg');
  background-size: 1em 1em;
  opacity: 0.55;
  background-position: 0.05rem 0.2rem;
  background-repeat: no-repeat;
  height: 1rem;
  width: 1rem;
  border-radius: 0rem;
  /*鼠标停留在图标上时,图标呈现发光效果*/
  &:hover {
      opacity: 1;
    }
}
然后在设置社交平台的icon
social:
  CSDN: https://blog.csdn.net/Lxn2zh || fa custom csdn
这里要使用custom
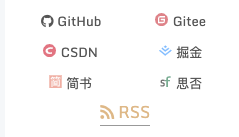
效果如下

参考文献
- next主题修改侧边栏icon
